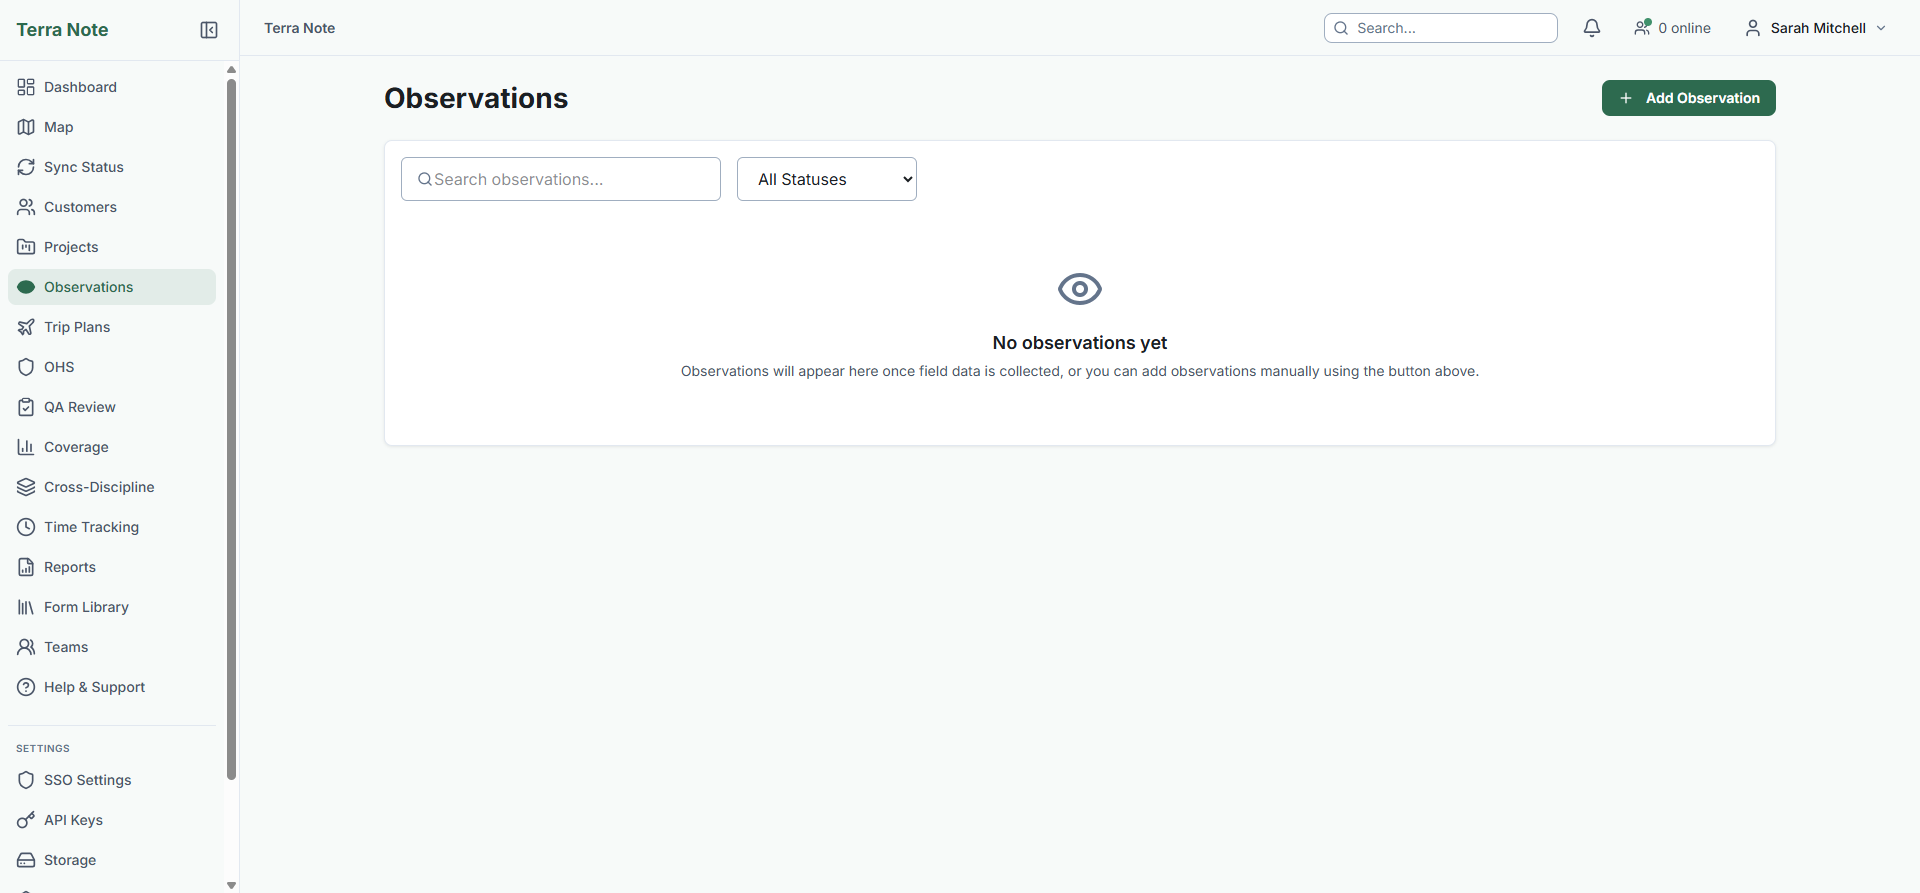
How do I enter an observation manually from the web?
TerraSitu is designed for mobile-first field data capture, but you can also enter observations directly from the web portal. This is useful for:
- Retrospective entry — recording an observation after the fact (e.g. from field notes or a paper form)
- Desk-based review — adding observations before or after a field visit
- Correction — entering data that was missed during a field session
Web-entered observations are flagged with data quality notes so reviewers understand what was and was not captured by a device in the field.
Step 1 — Open the Add Observation form
Go to Observations in the sidebar and click Add Observation in the top-right corner.
The Add Observation modal opens. It is divided into sections — work through each one from top to bottom.
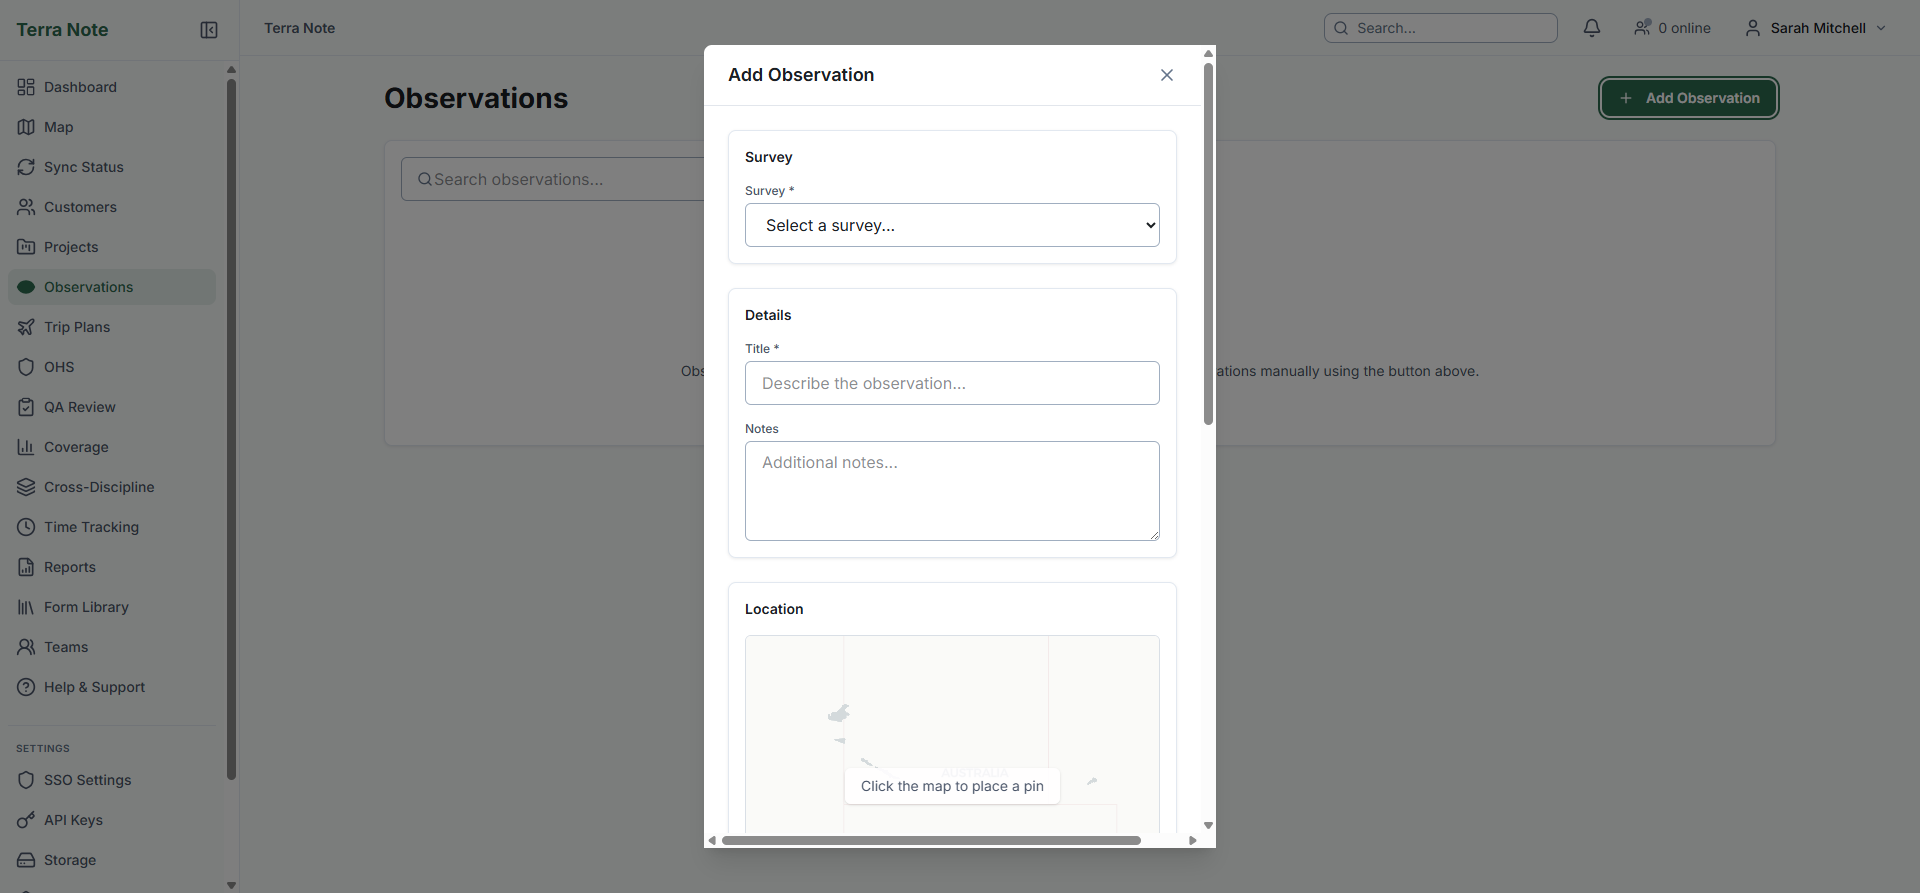
Step 2 — Select a survey
Choose the survey this observation belongs to from the Survey dropdown. Only surveys you have access to are listed.
If a survey is not in the list, check that it has been created under the correct project and site, and that you have been assigned to the project.
Step 3 — Fill in the details
Enter a descriptive Title for the observation (required). The title should identify the subject of the observation clearly — e.g. "Spotted Gum stand — northern boundary" or "Context 004 — fill deposit".
Add any free-text Notes to capture additional context, methodology, or observations that don't fit the structured form fields.
Step 4 — Set a location
You have three ways to set the observation location:
Click the map to place a pin
Click anywhere on the map to drop a pin at that location. You can drag the pin to adjust it after placement. The latitude and longitude fields update automatically.
Upload a photo with GPS EXIF data
If you attach a geotagged photo (taken on a smartphone or GPS camera) in the Photos & Media section, TerraSitu will detect the embedded GPS coordinates and offer to use them as the observation location.
When prompted, click Yes, use this location to apply the photo's EXIF coordinates to the pin.
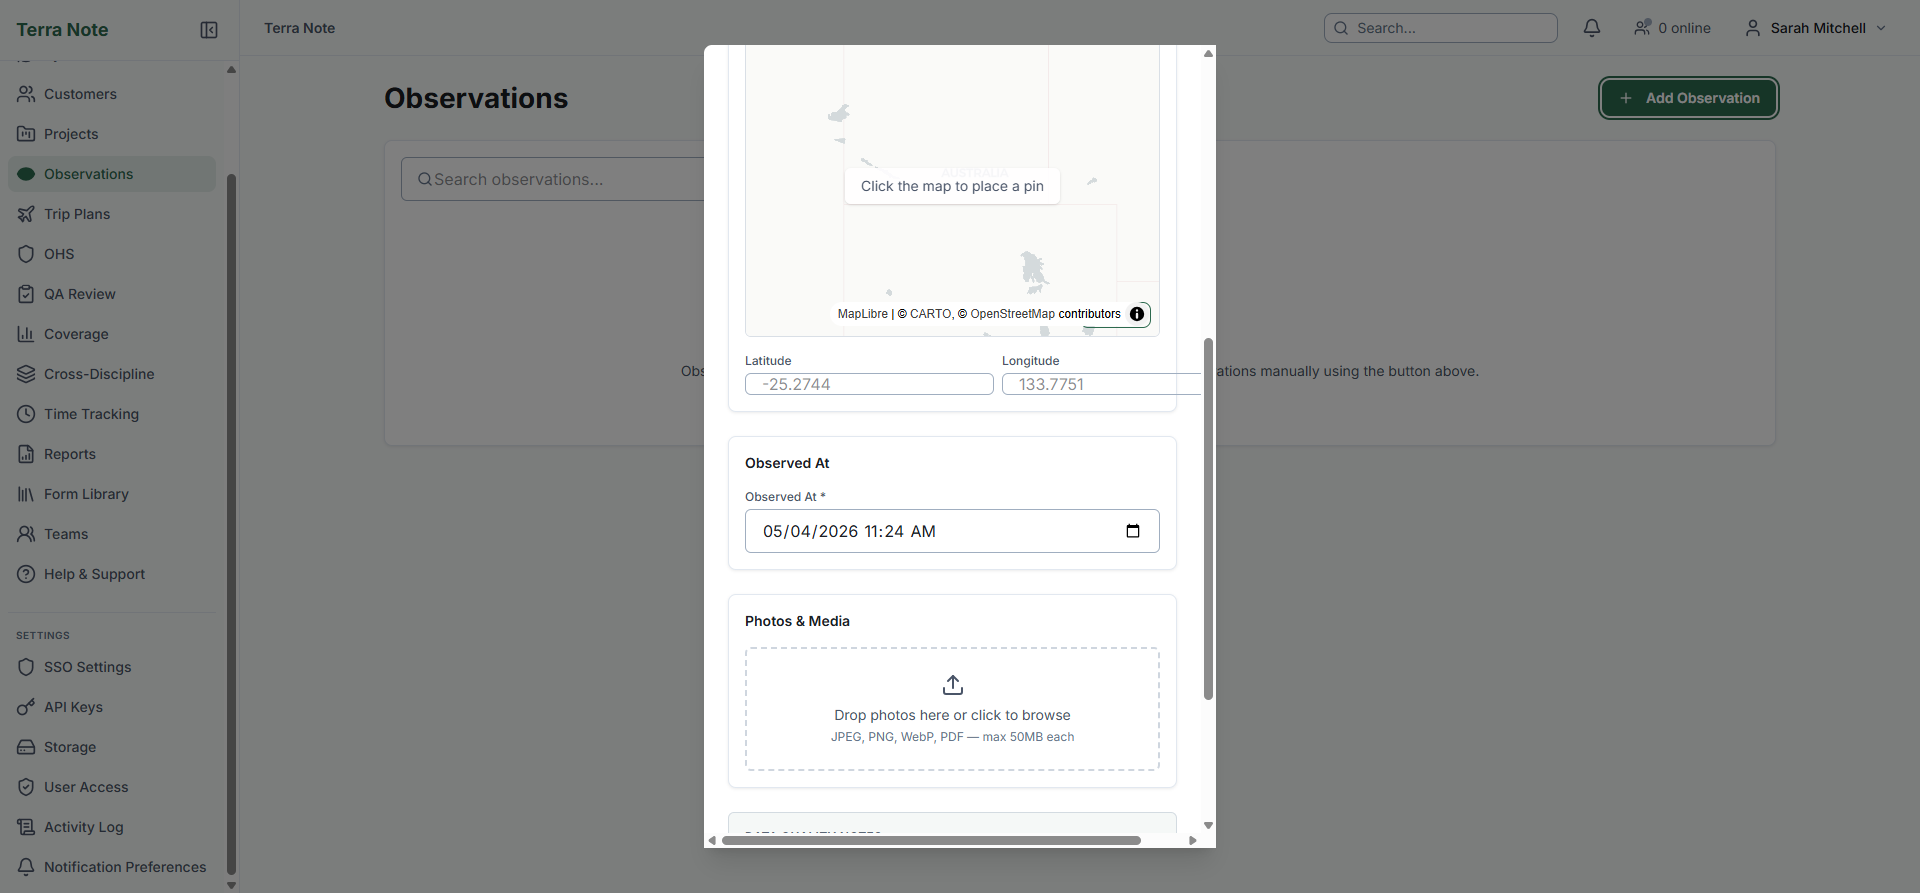
Type coordinates manually
Enter latitude and longitude directly in the number fields below the map.
No GPS accuracy is recorded for web-entered observations. Unlike mobile observations where the device reports GPS accuracy in metres, web-entered locations have no accuracy metadata. Reviewers will see a caveat noting this when they view the observation.
Step 5 — Set the observed date and time
Enter the date and time the observation was actually made — not the date you are entering it. If you are entering a retrospective observation, use the date and time from your field notes or paper form.
If you upload a photo with an EXIF timestamp, you will be offered the option to use the photo's capture time. Note that EXIF time is the device's local time with no timezone recorded — you should verify it is correct before accepting.
Step 6 — Attach photos and media
Drag photos into the Photos & Media drop zone, or click to browse. JPEG, PNG, WebP, and PDF files up to 50 MB each are supported.
When you add a geotagged JPEG, TerraSitu checks for embedded GPS coordinates and capture time. If found, you will be prompted to use them for the location and/or observed-at time.
Step 7 — Review the Data Quality Notes
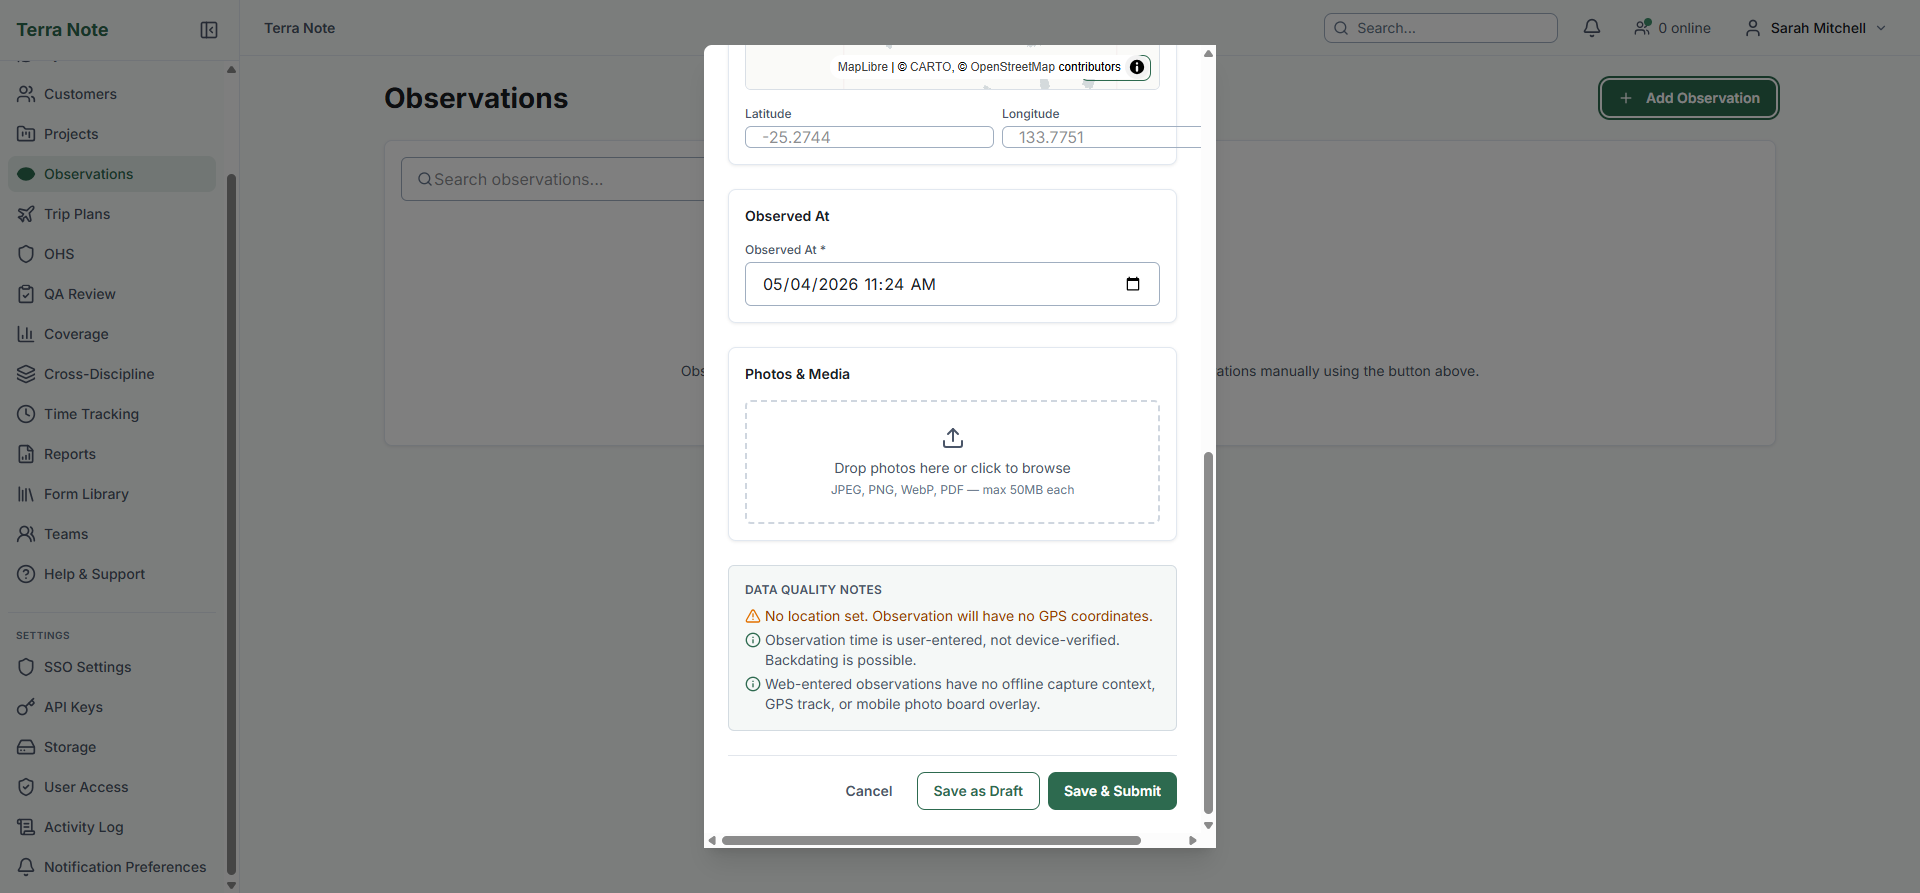
The Data Quality Notes panel appears at the bottom of the form. It lists any quality gaps compared to a mobile-captured observation, such as:
| Caveat | What it means |
|---|---|
| No GPS coordinates set | No location was set for this observation |
| No GPS accuracy | Location was set via map pin or typed coordinates — no device-verified accuracy |
| Location from photo EXIF | Location was extracted from a photo — may differ from the actual observation point |
| Manually entered coordinates | Coordinates were typed — verify accuracy before submitting |
| Observation time is user-entered | Time was entered manually — backdating is possible |
| EXIF time — device-local, no timezone | Photo time was used but timezone is unknown |
| No offline capture context | No GPS track, mobile photo board overlay, or offline survey context |
These caveats are stored with the observation and are visible to QA reviewers. They do not block saving — they are informational flags.
Step 8 — Save the observation
Click Save as Draft to save without submitting, or Save & Submit to submit it for QA review immediately.
After saving, you are taken to the observation detail page where you can edit it, upload additional media, or delete it.
Editing and deleting observations
To edit an observation, open it from the Observations list and click Edit (Field Researcher role or above).
To delete an observation, open it and click Delete (Project Lead role only). You will be asked to confirm before the observation is permanently removed.
Editing a synced mobile observation via the web will overwrite the original field-captured data. A caveat is shown in the edit form as a reminder.
Related Articles
- Submitting Observations — Recording observations in the field with the mobile app
- QA Review — Reviewing and approving observations before reporting
- Team Roles — Role-based access and what each role can do