Importing GIS data
TerraSitu accepts spatial data from most standard GIS formats. Imported layers appear on the map as site context — study area boundaries, heritage zones, vegetation polygons, lot boundaries, and any other spatial reference data your team needs in the field.
Supported formats
| Format | Extension | Notes |
|---|---|---|
| GeoJSON | .geojson, .json | Preferred for web GIS workflows |
| KML / KMZ | .kml, .kmz | Google Earth export format |
| Shapefile | .zip | Must be zipped — see below |
| GML | .gml | Geography Markup Language |
| GPX | .gpx | GPS track and waypoint files |
Preparing a Shapefile for import
Shapefiles consist of multiple component files. Before importing, zip them together:
- Ensure your archive contains at minimum:
.shp,.dbf,.shx - Include
.prjfor coordinate reference system information (strongly recommended) - The
.zipmust not contain subdirectories — all files in the root
Warning: Shapefiles without a
.prjfile will be imported assuming WGS84 (EPSG:4326). If your data is in a different CRS (e.g. GDA2020 / MGA zone), include the.prjfile to ensure correct reprojection.
Importing a layer
- Open a site or survey detail page and navigate to the Map tab, or go to Map in the main navigation
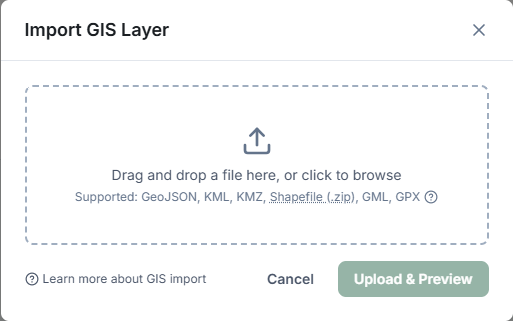
- Click Import GIS Layer
- Drag and drop your file, or click to browse
- Click Upload & Preview — the file is validated and a preview appears on the map
- Give the layer a name and optional description
- Click Confirm Import
The layer is now saved to the site or survey and will be included in survey packages synced to mobile devices.
After import
- Layers appear in the GIS Layers panel on the site or survey map view
- Toggle layer visibility using the eye icon
- Each layer shows the feature count and source format
- Layers are included in survey packages pushed to mobile
Clipping at import
When you upload a large dataset — a statewide cadastral layer, a national vegetation map — you can permanently trim it to just the area you need during import. This saves storage and prevents very large layers slowing down the mobile app.
After clicking Upload & Preview, expand the Clip to area section before confirming.
Clip source options
- Existing layer — select a polygon layer already imported to this site. All features from your new dataset that intersect that boundary (plus any buffer you set) are kept; the rest are discarded.
- Draw polygon — click directly on the preview map to trace your area of interest. Click at least 3 points, then double-click to close the polygon.
Buffer
Buffer adds a margin around your clip boundary so features that are adjacent to — but not overlapping — the boundary are also included. Options: None, 50 m, 100 m, 250 m, 500 m.
Live preview
The map updates as you configure the clip. Grey features will be excluded; green features will be imported. The counter below the map shows how many features will be imported out of the total in your file.
Note: Clipping is permanent — only the included features are stored. If you clip too aggressively, re-import the original file. For non-destructive post-import filtering, use the GIS Layer Editor instead.
File size limits
Maximum upload size is 100 MB. For larger datasets, consider simplifying geometry or splitting into multiple layers before importing. Very dense polygon boundaries can be simplified in QGIS using Vector > Geometry Tools > Simplify without meaningful loss of accuracy at field scale.
Coordinate reference systems
All imported data is reprojected to WGS84 (EPSG:4326) for storage. The original CRS is detected from the .prj file (Shapefile) or embedded metadata (GeoJSON, KML). If reprojection fails, the import will be rejected with an error — check that your .prj file matches your data.
Related Articles
- Creating a project — Setting up sites with boundaries and GIS layers
- Working with the map — Navigating and filtering layers on the map view